Basic configurations for working with Azure AD B2C
Post Summary
Hello, welcome to my first post :), in this post I will describe how my environment is configured for working with Azure AD B2C. Much of this configuration is necessary due to the use of custom policies; if this is not your case, you can skip this post.
Editor Configuration
For editing policies, I will use VS Code. I strongly recommend that you use it too, as there is an extension from Microsoft itself that will help you a lot throughout the process and is the reason why I am writing this post, so let's get straight to the point.
Azure AD B2C Tools
The Azure AD B2C extension is a tool to assist in managing and configuring custom policies. It offers an interface that helps you edit XML files, with some of its features being:
- Autocomplete: Code suggestions to facilitate the writing and configuration of custom policies, whether in the configuration of claims, technical profiles, claims transformations, and also with autocomplete options based on your edits.
- Go to definition: Facilitates navigation between components (right-click and go to definition or hold "Control" and click).
- Validation: Real-time error checking and validation of XML files against the Azure AD B2C schema (but don't get too excited, this validation is more superficial and won't detect trivial logic errors or even incorrect claim names).
- Compilation and upload of your custom policy directly from VS Code: The extension compiles and returns all your policies ready for upload. This step is necessary as it complements the next point I will address. It is also possible to upload directly from VS Code through these steps, but I personally don't use it; I find it easier to control manually through the portal.
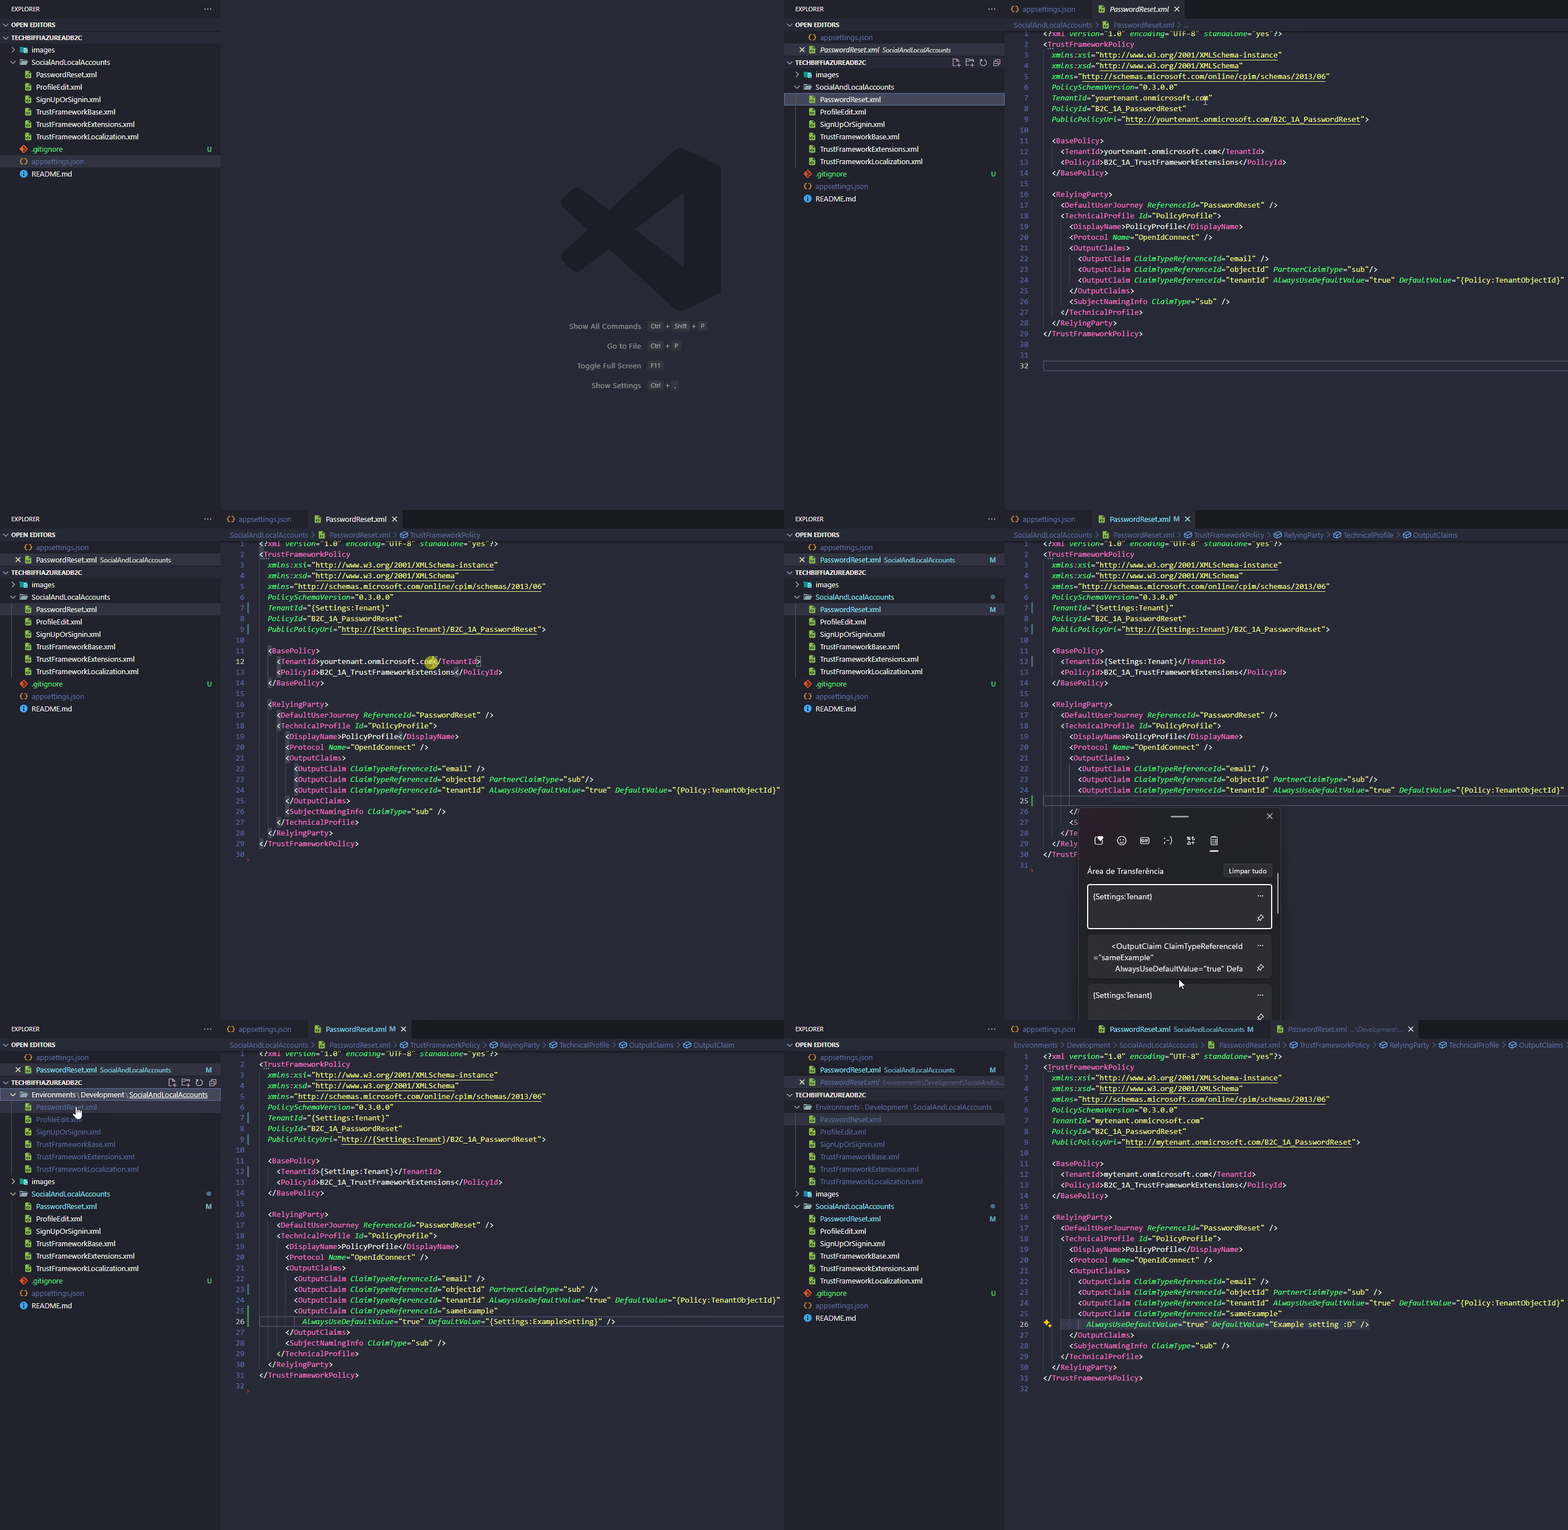
- Credential management: This is the "trick" of the process. During your development, it is natural to have two environments, a test environment (famous HMA) and the production environment. This feature will allow you to use environment variables instead of hardcoding some parts; later, when compiling your custom policies, it will generate both environments ready for upload.
For the extension to work, you will need the appsettings.json file. You can create it manually or have the extension create it for you. To have the extension create it for you, do the following:
- Open the project with your custom policies, hold the keys CTRL + SHIFT + P (or click on the command palette and type ">") and search for B2C Build all policies.
- When you click on the option, the extension will already identify that you don't have the file and will ask if you want to create it. Just click on "Yes".
Overview of the file:
appsettings.json1{2"PoliciesFolder": "Folder of your policies",3"EnvironmentsFolder": "Environments", // Folder where after the build the policies will be pasted.4"Environments": [5{6"Name": "Development",7"Production": false,8"Tenant": "Your tenant description (this information you will find in the Resource Group)",9"PolicySettings": {10"TenantId": "Your dev environment tenant Id (this information you will find in the Resource Group)",11"IdentityExperienceFrameworkAppId": "Your dev environment AD app Id",12"ProxyIdentityExperienceFrameworkAppId": "Your dev environment AD Proxy app Id",13"DeploymentMode": "Development",14"MyApiUrl": "Your dev environment API URL",15"StorageUrl": "Your dev environment storage URL",16"AnyOtherSetting": "Any other setting",17"ExampleSetting": "Example setting"18}19},20{21"Name": "Production",22"Production": true,23"Tenant": "Your tenant description (this information you will find in the Resource Group)",24"PolicySettings": {25"TenantId": "Your production environment tenant Id (this information you will find in the Resource Group)",26"IdentityExperienceFrameworkAppId": "Your production environment AD app Id",27"ProxyIdentityExperienceFrameworkAppId": "Your production environment AD Proxy app Id",28"DeploymentMode": "Production",29"MyApiUrl": "Your production environment API URL",30"StorageUrl": "Your production environment storage URL",31"AnyOtherSetting": "Any other setting",32"ExampleSetting": "Example setting"33}34}35]36}
Now that all your environment variables are properly configured, you need to enter each of your policies and change the "hard coded" codes to your variables. Below I will exemplify such changes:

To start this blog, I created a B2C repository from scratch and am filling it as I create the posts. The changes for using the extension are in the commit e048d49.